
Key Takeaways
A well-planned gutter system does more than carry rainwater away from the roof. It helps protect siding, landscaping, fascia, and the foundation through Connecticut’s changing seasons.
- Choose gutter material, profile, size, and construction method based on the home and roofline.
- Measure roof edges, valleys, and downspout locations before comparing installation quotes.
- Expect project costs to vary with material, linear footage, home height, roof complexity, and repairs.
- Plan for heavy rain, freeze-thaw cycles, snow, leaves, and pine needles.
- Keep new gutters inspected and cleaned so small problems do not become drainage failures.
Choosing the right gutter system for a Connecticut home
Connecticut homes range from compact colonials to large, steep-roofed houses with several additions. The right gutter system depends on more than appearance: roof area, runoff volume, exposure to trees, and the condition of the mounting surfaces all matter. A thoughtful choice can reduce overflow and make future maintenance simpler. Homeowners comparing options can also review Connecticut gutter services to understand the types of installation, repair, and replacement work commonly available.
Aluminum, copper, steel, and vinyl compared
Aluminum is widely used for residential gutters because it is relatively light, does not rust, and comes in many painted finishes. Copper offers a distinctive appearance and develops a natural patina, but it usually costs more and requires compatible fasteners and fittings. Steel is strong, though its finish and exposed cut edges need attention to limit corrosion. Vinyl is lightweight and often less expensive, but it can become brittle in cold weather and may be less forgiving on a home exposed to snow and ice.
The best material is the one that suits the roofline, budget, and desired service life rather than the one with the longest list of features. Look closely at fascia condition, fastener quality, and how each material will connect to downspouts. Color matters too, especially when gutters run along a prominent porch or a contrasting trim line.
K-style versus half-round gutters
K-style gutters have a decorative ogee-shaped front and are the most common residential profile. Their flat back can fit neatly against many fascia boards, and the profile offers useful capacity without looking overly large. Half-round gutters have a curved interior and a more traditional appearance, which can complement older homes or restoration projects.
Neither profile is automatically right for every property. Half-round systems may require different brackets and mounting details, while K-style gutters often provide a broad selection of sizes and accessories. Compare the profile with the roof edge, trim, downspouts, and overall character of the house before making a visual decision.
Seamless versus sectional gutters
Sectional gutters arrive in shorter lengths and are joined at the corners and along straight runs. They can work for small, simple rooflines, but every joint is a potential location for a leak or separation. Seamless gutters are roll-formed on site in continuous runs, with joints generally limited to corners and outlets.
For many Connecticut homes, seamless construction is a practical choice because it reduces mid-run joints and creates a cleaner appearance. OnScene Gutters connects property owners with local contractors for seamless gutter installation, described as custom-fit and leak-resistant. The installation still depends on sound fascia, properly spaced hangers, correct slope, and carefully sealed corners.
Selecting the right gutter size and profile
Five-inch gutters are common on many residential roofs, while larger profiles may be appropriate for broad roof planes, steep pitches, or areas where valleys concentrate water. Size should be selected from the roof’s drainage demand, not simply copied from a neighboring house. A large gutter with too few downspouts can still overflow, while a correctly sized gutter with poor slope will not drain well.
Ask the installer to explain how roof area, pitch, valleys, and downspout placement informed the recommendation. It is also worth checking whether the selected outlet and downspout diameter can move the expected volume of water without backing up during a storm.
Assessing your home’s drainage needs
A gutter project begins at the roof, but its real job ends at a safe discharge point away from the foundation. Connecticut’s intense summer rain, spring storms, and winter freeze-thaw cycles make that path worth examining in detail. Walk around the house during or after rain if it is safe, and look for overflow, splash marks, wet foundation walls, and areas where soil has washed away. These observations often reveal drainage problems that a simple gutter replacement would not solve.

Measuring roof edges and gutter runs
Measure each straight roof edge separately rather than estimating the entire perimeter. Note inside and outside corners, changes in roof height, porches, dormers, and sections that already have downspouts. A sketch with dimensions is more useful than a single total because it shows where water is collected and where it must be released.
For a preliminary budget, total the measured runs and add the lengths of downspouts and extensions. An installer will verify the numbers on site, particularly when roof edges are high, irregular, or difficult to access. Measurements should never require climbing an unstable ladder or walking on a wet roof.
Calculating the number and placement of downspouts
Downspouts should be distributed so long gutter runs do not carry all of the water to one outlet. Place them near corners, at the ends of long sections, and below roof valleys when those areas concentrate runoff. The final arrangement also has to respect doors, windows, walkways, decks, and the route to a safe discharge point.
There is no universal downspout count for every Connecticut house. Roof size, pitch, gutter capacity, local rainfall, and the shape of the system all affect the calculation. A professional can check whether the outlets are large enough and whether water will be divided before a run becomes overloaded.
Evaluating roof pitch, valleys, and runoff volume
A steep roof can send water into the gutter with greater force, while a shallow roof may collect a large area before reaching the edge. Valleys deserve special attention because two roof planes may deliver concentrated flow to one short gutter section. Splash guards, larger outlets, or additional downspouts may be needed in those locations.
Look for staining beneath valleys and at the ends of gutter runs. During a storm, observe whether water jumps over the front edge or pours through a corner. The roofline sets the demand for the drainage system, so a quote that considers only perimeter length may miss important design details.
Planning downspout extensions and underground drainage
A downspout that ends beside the foundation can deposit a surprising amount of water in one small area. Extensions should carry discharge toward a stable, sloped location where it will not flow back toward the house, wash out mulch, or cross a walkway. Some properties can use splash blocks, while others need longer extensions or underground downspout drainage.
Before burying a line, identify utilities, septic components, wells, low spots, and property boundaries. Underground drainage also needs a suitable outlet and a route that will not trap water or freeze in a way that damages the pipe. The drainage plan should be settled before the gutters are fabricated, not added as an afterthought.
Understanding gutter installation costs in CT
The cost of gutter installation in CT is shaped by the whole project, not just the price of the gutter material. Linear footage is one starting point, but height, roof design, access, corners, downspouts, removal, and repairs can change the final estimate. Two houses with the same footprint may have very different installation requirements. For a useful comparison, gather written descriptions of materials, dimensions, labor, disposal, and any allowances for concealed damage.
How material and linear footage affect pricing
Longer runs require more material, outlets, hangers, and labor, while a complex roofline increases cutting, fitting, and corner work. Aluminum usually sits in a more accessible price range than copper, which is a premium material. Steel and vinyl can fall in different positions depending on gauge, finish, availability, and the installer’s process.
A cost comparison should show more than a single per-foot figure. The gutter cost estimate guide covers factors such as material type, linear footage, roofline complexity, downspout installation, and fascia repair. Use that framework to ask whether each bid includes the same scope rather than choosing the lowest unexplained number.
Labor costs for one-story and multi-story homes
A one-story ranch may allow quicker access and simpler handling than a two-story colonial. Multi-story work can require additional setup, longer ladders, staging, or specialized equipment. Steep slopes, tight side yards, porches, and landscaping can also slow the job even when the roof perimeter is modest.
Labor should include removal when old gutters are being replaced, preparation of the mounting surface, installation of hangers, sealing of corners and outlets, downspout connections, and water-flow testing. Ask whether cleanup and disposal are included. A clear scope makes it easier to compare labor fairly.
Additional costs for fascia, soffit, and drainage repairs
Gutters often conceal problems at the fascia, rafter ends, or soffits. Soft wood, pulled fasteners, staining, and insect damage may need correction before new hangers can support a gutter. Downspout outlets may also need relocation, and a failed extension may call for a new drainage route.
Do not cover deteriorated wood simply to keep the initial quote low. New gutters mounted to weak material can sag or pull away, leaving the underlying problem unresolved. Request photos or a clear explanation of any recommended fascia, soffit, or drainage repair so you can distinguish necessary preparation from optional upgrades.
When an on-site estimate is necessary
An on-site estimate is the sensible choice when the home has multiple roof levels, valleys, unusual corners, existing water damage, or underground drainage. It allows the installer to measure each run, inspect the fascia, check downspout discharge, and identify access limitations. It also gives you a chance to discuss colors, profiles, guard options, and the timing of the work.
A remote estimate may help with early planning, but it cannot reliably reveal concealed rot or a poor discharge point. Before accepting a proposal, confirm the material, profile, size, linear footage, number of downspouts, removal terms, repairs, warranty language, and cleanup responsibilities.
Preparing for Connecticut weather conditions
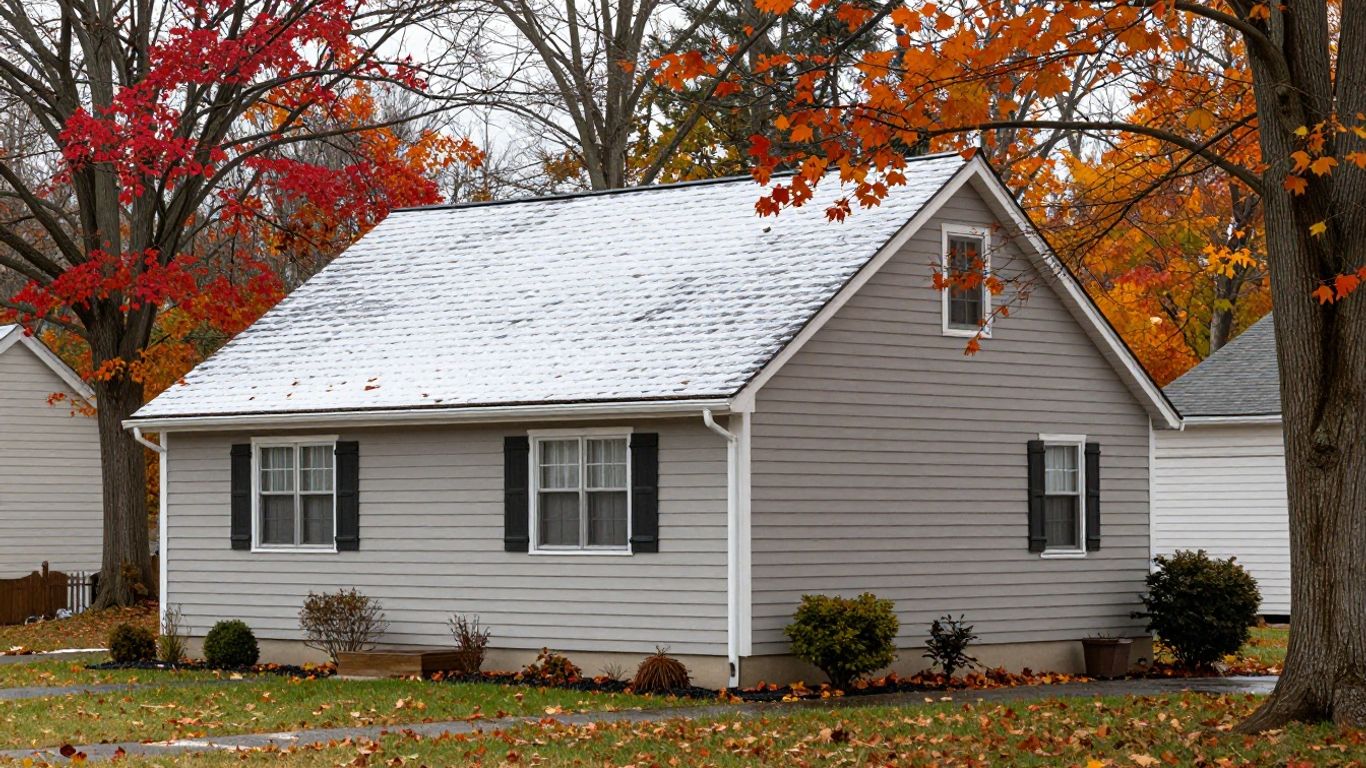
Connecticut gutters face several kinds of stress in the same year. Heavy rainfall tests capacity and slope, falling leaves fill the troughs, and snow and ice load the edges during winter. Freeze-thaw movement can loosen fasteners and open small gaps at joints or corners. A system designed for ordinary weather may struggle if the roof funnels a large volume of water into one short run.
Managing heavy rain and spring storms
Spring storms can send water across the roof faster than a partially clogged gutter can accept it. Check that valleys have a clear path into the gutter and that downspouts are not restricted at the outlet or underground connection. Water marks below the fascia, mulch pushed away from the house, and overflow at corners are signs worth investigating after a storm.
A properly sloped system should move water steadily toward the outlets rather than leaving standing water in the trough. If one section repeatedly overflows while nearby sections remain dry, the issue may be local capacity, a blockage, an incorrect slope, or a valley that needs additional control.
Reducing ice dams and winter freeze damage
Gutters cannot prevent every ice dam because ice dams begin with roof temperature differences and snow conditions. They can, however, become part of a broader winter plan when they are properly sloped, securely fastened, and free of leaves before freezing weather. Downspouts and extensions should also be checked for trapped water and movement.
Avoid chipping ice from the roof edge or pulling on frozen gutters. Those actions can damage shingles, flashing, hangers, and fascia. If ice is already causing water to enter the home, contact a qualified professional rather than working from a ladder in icy conditions.
Accounting for snow, pine needles, and leaf buildup
Homes under mature trees may need more frequent attention than homes in open yards. Pine needles can mat together, while broad leaves can form a layer that slows water entry even when the gutter does not look completely full. Snow sliding from a steep roof can also bend or detach the front edge.
A seasonal inspection should check the trough, outlet, downspout, end cap, corners, and the space between the gutter and fascia. These are the areas where debris and movement commonly interrupt the path of water. If roof snow routinely slides into the system, discuss snow-retention and roof-edge details with an installer.
Choosing finishes that withstand seasonal changes
A finish should suit the home’s trim and tolerate repeated wetting, drying, freezing, and thawing. Factory-finished aluminum offers many color choices, while copper is typically selected for its evolving appearance rather than a painted match. Steel needs careful attention to coating quality and exposed edges, particularly where salt or persistent moisture may occur.
Keep sample colors next to the siding and trim in daylight before deciding. Also ask how cut ends, corners, fasteners, and downspouts will be finished. Small differences in those details can affect both appearance and long-term maintenance.
The gutter installation process
Professional installation is a sequence of inspections, preparation, fitting, and testing. The visible gutter is only one part of the work; the support behind it and the route below it determine whether water will continue moving properly. A careful crew explains unexpected conditions before changing the scope. That makes the finished system easier to understand and maintain.
Inspecting the roofline, fascia, and soffits
The installer should examine the roof edge, drip edge, fascia, soffits, corners, and existing downspout paths before removing anything. They should look for rot, loose boards, staining, damaged flashing, and areas where the roof discharges beyond the current gutter. The inspection also confirms access and helps identify where new outlets can be placed.
This is a useful time to discuss the roof’s valleys and any recurring overflow. If the fascia is compromised, it should be repaired or reinforced before hangers are installed. The gutter cannot compensate for a weak mounting surface.
Removing old gutters and preparing mounting surfaces
Old gutters are removed carefully so damaged fascia is not made worse. The crew clears leftover fasteners, checks the wood, and repairs or replaces unsuitable sections as agreed in the scope. They may also correct the drip edge or adjust the outlet plan before the new system goes up.
Preparation is easy to overlook because it disappears when the job is complete. Yet it affects the alignment, strength, and serviceability of the finished installation. Make sure the proposal states how concealed damage will be handled if it is found during removal.
Installing hangers, slopes, and seamless gutter runs
Hangers must be fastened into sound material and spaced to support the gutter without allowing it to bow. The run receives a controlled slope toward its outlet; too little slope leaves water standing, while too much can look uneven and move water too quickly toward one end. Corners and end caps are sealed as part of the installation.
Seamless runs are generally formed to the measured length on site, reducing mid-run joints. The result can be clean and durable when the fascia is straight and the hangers are correctly placed. It is worth checking the alignment from the ground before the crew finishes cleanup.
Connecting downspouts and testing water flow
Downspouts should connect securely to the outlets and follow a route that avoids windows, doors, walkways, and vulnerable landscaping. Extensions or underground lines then carry water farther from the foundation. The installer should confirm that each connection is open and that the discharge point is stable.
Testing with a hose can reveal slow drainage, leaks at corners, loose connections, and water that pools near the house. After the test, inspect the fascia and ground below the outlets. A short conversation about what was tested and what to watch for during the first storm completes the installation more effectively than cleanup alone.
The video can be useful for visual orientation, but it should not be treated as a substitute for a site assessment. Ladder work, roof access, fascia repairs, and underground drainage all carry risks that are easy to underestimate.
Deciding whether to add gutter guards
Gutter guards can reduce the amount of debris entering a gutter, but they are not a universal answer to drainage problems. A guard cannot correct inadequate slope, a badly placed downspout, damaged fascia, or a roof valley that overwhelms the trough. Start with a sound gutter system, then consider how much debris reaches it and how difficult cleaning is on the property.
How different guard designs handle Connecticut debris
Screens, covers, and fine-mesh products manage water and debris in different ways. Large openings may pass small leaves and pine needles, while finer mesh can restrict debris but may need cleaning when pollen, roof grit, or wet organic matter accumulates. Some covers rely on surface tension and need the correct pitch and installation angle.
Examine the trees around the house, the roof material, and the type of debris present. A product that performs well with dry leaves may behave differently when needles and wet seed pods collect on top. The guard must also remain compatible with the gutter profile and roof edge.
When gutter guards provide the greatest value
Guards tend to be most useful where cleaning is frequent, ladder access is difficult, or mature trees drop debris over large sections of roof. They can also make sense for a two-story home where routine cleaning is more disruptive or hazardous. The value comes from reducing maintenance demands, not from making the system completely maintenance-free.
Before buying, compare the cost of the guard with the expected cleaning schedule and the condition of the existing gutters. If the system is sagging or leaking, replacement or repair should come first. Adding a guard to a failing gutter usually preserves the underlying problem.
Why guards still require periodic maintenance
Even a well-designed guard can collect material on its surface or allow fine particles into the gutter. Inspect the top, edges, corners, and downspout outlets at least during the spring and fall maintenance cycle. Check for lifted sections, gaps, bent panels, and debris dams after severe weather.
Maintenance may be lighter than scooping an open gutter, but it still matters. Blocked outlets can cause water to back up behind the guard, and loose sections can allow debris to enter. Follow the product’s cleaning recommendations rather than pressure-washing delicate mesh without guidance.
Installing guards on new or existing gutters
Installing guards with new gutters allows the installer to coordinate the roof edge, gutter profile, outlet locations, and attachment method from the start. Existing gutters can sometimes accept guards, but they should first be checked for slope, leaks, sagging, and secure mounting. Repairs may be needed before the guard can sit correctly.
Ask how the guard will be attached and whether it can be removed for inspection. Also clarify what happens at valleys, corners, end caps, and downspouts. Those transition points often determine whether the system remains easy to service.
Maintaining newly installed gutters
New gutters still need a maintenance plan. Debris, storms, ice, and normal movement can affect a system even when the installation was done correctly. A short inspection twice a year, with additional checks under heavy tree cover, helps preserve the drainage path. From the ground, homeowners can often spot early warning signs without climbing.
Scheduling spring and fall inspections
Spring inspection clears winter debris and checks for damage from ice, snow, and freeze-thaw movement. Fall inspection removes leaves and pine needles before cold weather arrives. If the property sits beneath dense trees, an extra visit may be sensible after major leaf drop or a series of storms.
A basic inspection should include the gutter channel, corners, end caps, outlets, hangers, downspouts, extensions, and soil near the discharge points. Cleaning is safest from the ground with suitable tools, or by a professional equipped for the roof height and conditions. Do not climb a wet, icy, or unstable ladder.
Spotting leaks, sagging, and separation early
Small leaks often appear at corners, end caps, or seams, while sagging suggests loose hangers, deteriorated fascia, or accumulated water. Gutters pulling away from the house may be visible from the ground as a widening gap behind the back edge. Peeling paint, stained siding, and soil erosion below a joint can also point to a problem.
After a storm, look for sections that have shifted, dents from branches, and downspouts that no longer align. Addressing a small defect early may limit damage to fascia and surrounding materials. OnScene Gutters provides access to local contractors for gutter repair, including work involving leaks, sagging sections, clogs, and downspouts.
Keeping downspouts and extensions clear
A clean gutter can still fail if its outlet or downspout is blocked. Flush the path when conditions are safe and confirm that water exits freely at the bottom. Check extension connections after mowing, landscaping, and freeze-thaw cycles because they can separate or shift toward the foundation.
Watch the ground during the next rainfall. Water should move away from the house without pooling against the foundation or washing out a narrow channel. If an extension repeatedly becomes displaced, a more secure connection or underground drainage plan may be appropriate.
Knowing when repair or replacement is the better option
Repair is often reasonable when damage is limited to a corner, end cap, hanger, or short section. Replacement deserves consideration when multiple runs leak, the metal is badly corroded or cracked, the system repeatedly pulls away, or the fascia behind it is extensively damaged. Repeated repairs can cost more over time while leaving the basic design unchanged.
Compare the age and condition of the entire system with the cost of correcting isolated failures. A professional assessment can separate a simple blockage from a capacity problem or structural issue. If a storm has detached a section, keep people away from the area and arrange an inspection instead of attempting a high ladder repair yourself.
Conclusion
A durable Connecticut gutter installation starts with the roofline and ends with a safe discharge point away from the foundation. Choose materials and profiles that suit the home, size the system for actual runoff, prepare the fascia properly, and plan for snow, ice, leaves, and heavy rain. With seasonal inspections and timely repairs, a well-installed system can quietly protect the property through the year.
Frequently Asked Questions
How much does gutter installation in CT cost?
Costs vary with material, linear footage, home height, roof complexity, downspout design, local labor, removal, and repairs. An on-site measurement is the most reliable way to receive an accurate project estimate.
Which gutter material is best for a Connecticut home?
Aluminum is a common practical choice, while copper, steel, and vinyl suit different budgets, appearances, and installation conditions. Consider weather exposure, fascia strength, maintenance expectations, and the home’s architectural style.
Are seamless gutters better than sectional gutters?
Seamless gutters have fewer mid-run joints, which can create a cleaner appearance and reduce potential leak points. Sectional gutters may still suit smaller or simpler projects, especially when properly supported and sealed.
How many downspouts does a house need?
The number depends on roof area, pitch, gutter size, valleys, and the length of each run. Downspouts should divide runoff so long sections do not carry excessive water to a single outlet.
How often should new gutters be cleaned?
Spring and fall are standard inspection and cleaning times. Homes beneath heavy tree cover may need additional cleanings, especially after leaf drop, pine-needle shedding, or major storms.
Do gutter guards eliminate maintenance?
No. Guards can reduce the amount of debris entering a gutter, but their surfaces, edges, outlets, and downspouts still need periodic inspection and cleaning.
When should gutters be repaired instead of replaced?
Repair may suit isolated leaks, loose hangers, or a short damaged section. Replacement is often more practical when failures are widespread, the material is badly deteriorated, or the system no longer handles the roof’s runoff effectively.